
If you’re diving into the world of vulnerability scanning and want a powerful, open-source tool to get started, OpenVAS by Greenbone is a great choice. In this guide, I’ll walk you through how to set up and run your first scan using Greenbone Vulnerability Management (GVM) on Kali Linux, complete with screenshots and useful tips.
🛠️ Step 1: Installing GVM
Start by making sure you have the required package:
sudo apt install gvm -y
This command installs the GVM package, which includes the OpenVAS scanner and the Greenbone Security Assistant (GSA), a web-based GUI.
⚙️ Step 2: Initial Setup
Once installed, run the initial setup script: sudo gvm-setup
Once the initial setup script completes. Verifiy it properly installed GVM by using the command
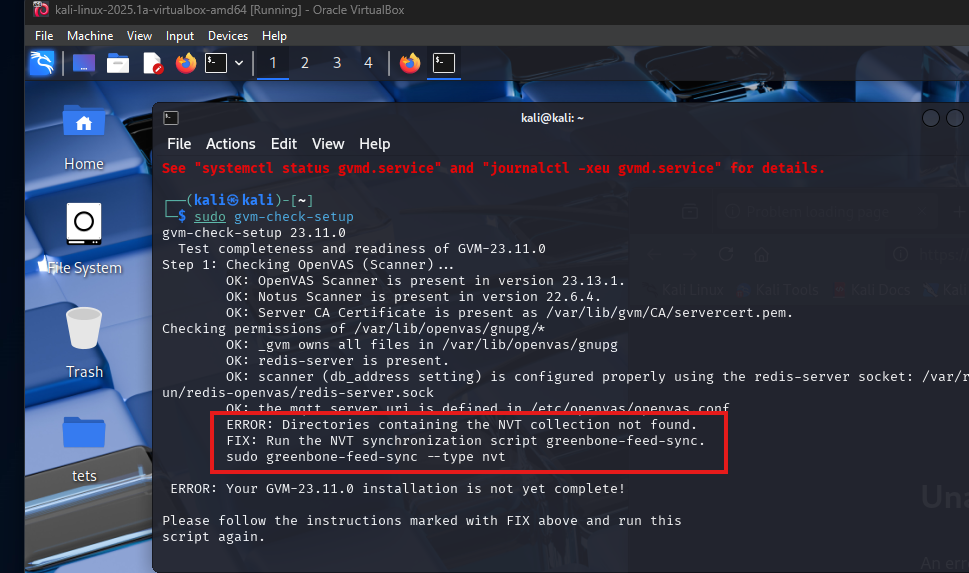
sudo gvm-check-setup
This command configures everything GVM needs—like setting up the database, feed syncs, and user credentials. Occasionaly you might see issues as outlined below but you can always look at the “FIX” action so you can troubleshoot and remediate issues during setup. Once issues are remediated run the sudo gvm-check-setup script as necessary.
🧪 Step 3: Verify Your Setup
Run a diagnostic check to ensure everything is working properly:
sudo gvm-check-setup
You’ll see a list of services being verified—your goal is to see “OK” across the board.
Don’t forget: GVM relies heavily on PostgreSQL, so make sure the PostgreSQL service is running properly.
🌐 Step 4: Access the Web Interface
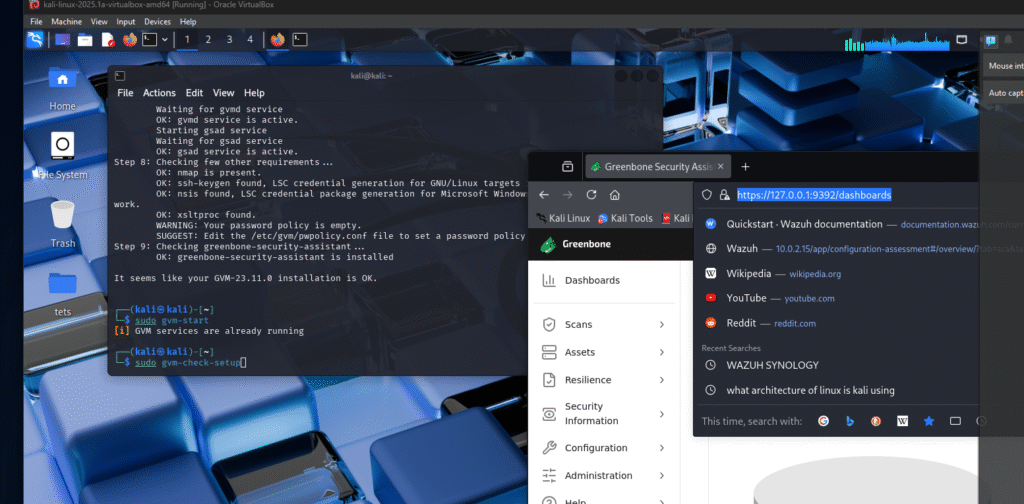
Once everything is green (pun intended), you should see:
It seems like your GVM-23.11.0 installation is OK.
You can now access the web interface (GSA) at: https://127.0.0.1:9392/dashboards
🔄 Step 5: Update Feeds
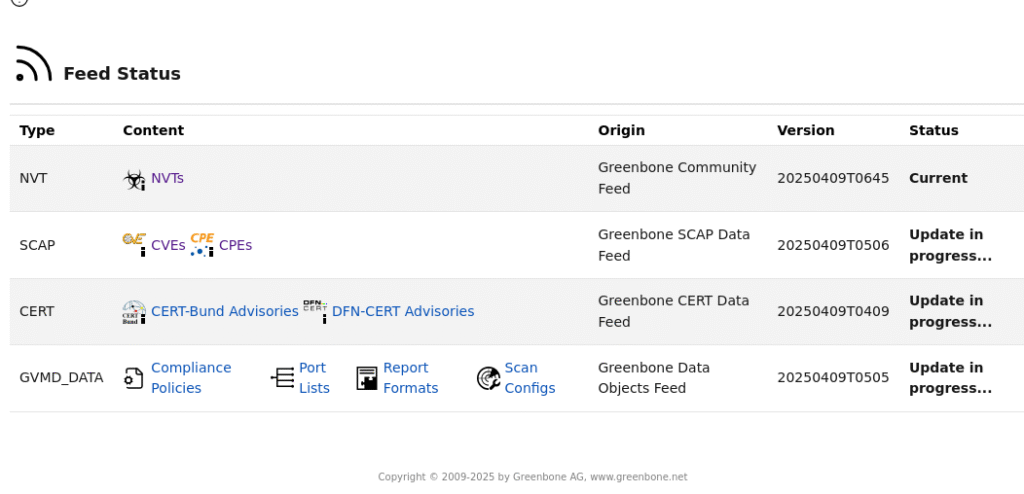
Before running scans, it’s important to ensure that the vulnerability feeds (NVT, SCAP, CERT, etc.) are up to date. Outdated feeds mean inaccurate or incomplete scan results.
To check, go to your GSA dashboard and look at the feed status. If they look stale:
sudo runuser -u _gvm — gvm-feed-update
Wait for the update to complete, then refresh your GSA page.
🎯 Step 6: Create Your First Target
Once your feeds are current, it’s time to set up a scan target.
Let’s say you’re testing against a vulnerable machine like Metasploitable2 from Rapid7. You can download it at https://www.rapid7.com/ja/products/metasploit/metasploitable/. Then you can create a VM instance using the image provided by rapid7. In my current setup I have a Kali linux VM located within the same network as the Metasploitable VM. Below are the steps in creating a target machine.
On the Greenbone web interface go to Configurations > Targets > Create Target
Enter a name and the IP address of your test machine. (Make sure your attacker machine (Kali) can ping the metasploitable vm before initiating a scan! Else, the scan will fail. Check the Reports tab before scanning—this ensures you’re starting fresh.

🐳 Bonus: Docker Setup (Optional)
If you prefer using containers, Greenbone also offers a Dockerized version of OpenVAS, which is quicker to set up and often more portable. You can follow the official Greenbone container guide here:
https://greenbone.github.io/docs/latest/22.4/container/index.html
🚀 Step 7: Launch Scans
Once everything’s ready:
Go to Configurations > Targets and enter the IP address or CIDR of your target.
Go to Scans > Tasks > Create Task, and select your defined target.
Configure the Scanner (OpenVAS or CVE) and select a Scan Config I usually just choose “Full and Fast” you can choose different scan types or make your own custom scan depending on your needs.
Start the scan and wait for it to complete.
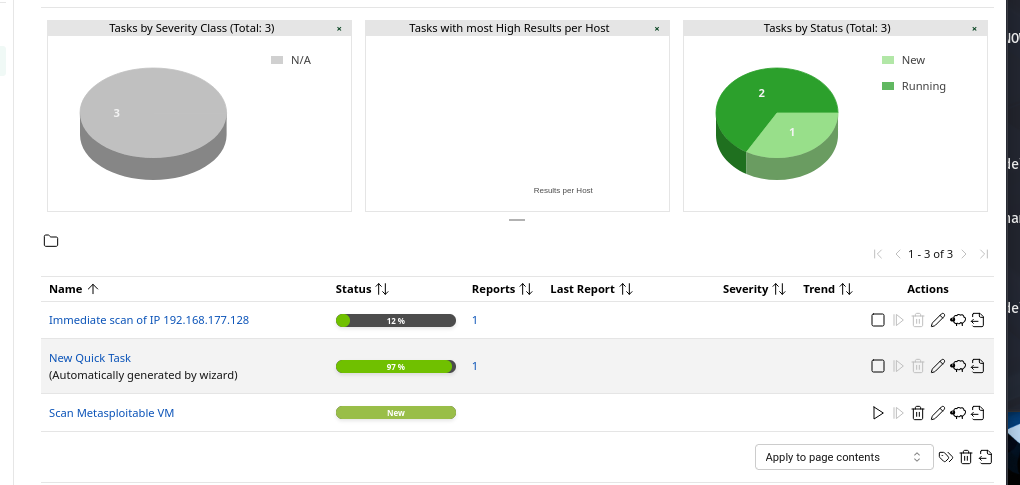
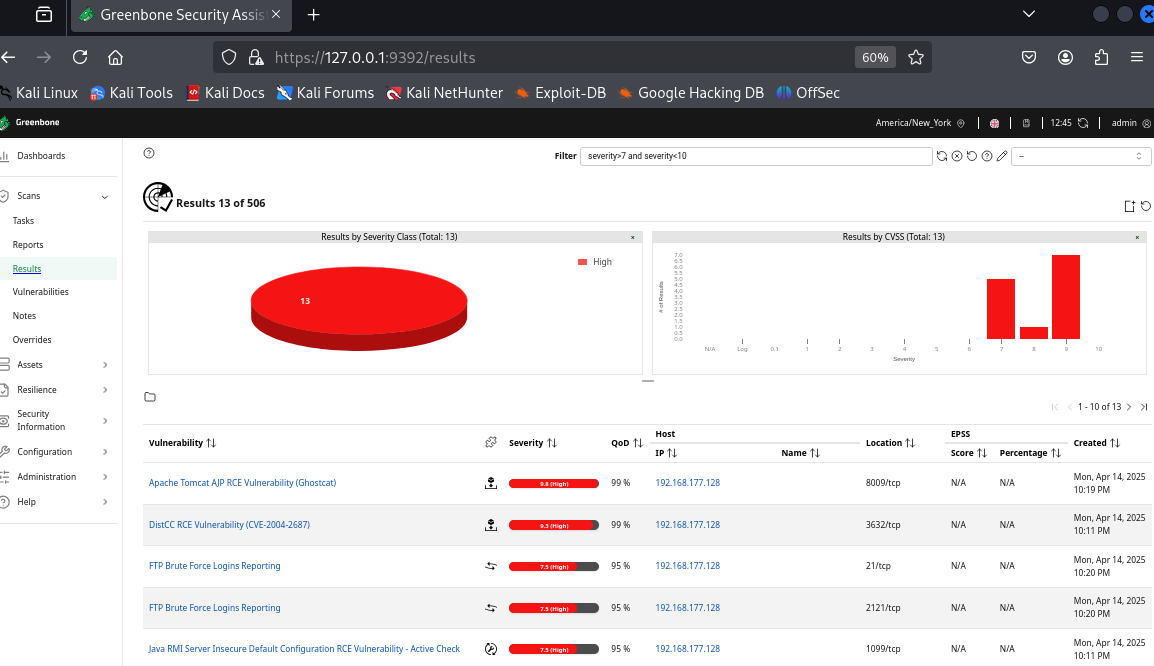
📊 Step 8: Analyze the Results
Once the scan finishes, head over to Reports to view your results.
Important: The results shown depend on the Quality of Detection (QoD) setting. If a finding’s QoD is lower than your scan threshold (default is 70%), it won’t be displayed. Now, since this is intended for “Vulnerability Scan” and not a “Penetration Testing” we will skip the Exploitation phase of the Cyber kill chain and focus on the attack surface discovered by GVM OpenVAS scanner.
🔍 Step 9: Triage and Remediate
With your results in hand, it’s time to take action. Here’s the workflow I personally follow:
Validate Findings
Remove False Positives
Analyze and Prioritize Vulnerabilities
Plan and Execute Remediation
Verify and Close
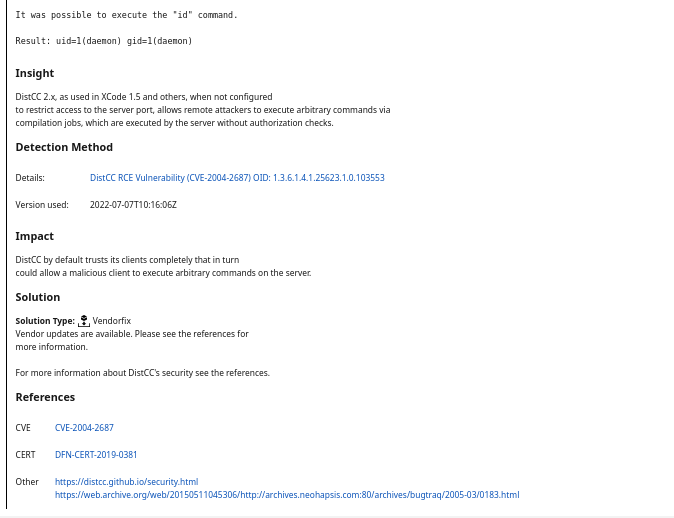
Each finding includes useful information like the CVE ID, impact level, and even recommended remediation steps which you can easily find by clicking on the vulnerability.
Exploring OpenVAS with Greenbone GVM is a fantastic way to get hands-on with real-world vulnerability management. Whether you’re learning the ropes or building out your cybersecurity toolkit, tools like these offer the depth and flexibility needed for serious security assessments.
Keep experimenting, stay curious, and remember—vulnerability scanning is only the beginning. The real power lies in how you interpret, prioritize, and respond to the findings.
If this guide helped you, feel free to share it—or leave a comment if you have tips, questions, or cool OpenVAS use cases of your own. Until next time, stay secure